Your home’s roof is a complex system made up of many parts that work together to protect your home and shelter your family. The failure of any one of those parts can result in a leaky roof—the stuff of nightmares for any homeowner.
There are many reasons a roof can leak, some related to weather, some to wear, and some to faulty installation—with plenty of overlap among them. Let’s look at some of the most common causes in Minnesota for a leaky roof.
Storm damage
Storms, and weather in general, could be considered a “macro” cause of roof leaks, facilitating and amplifying the disrepair by the “micro” causes below. Rain is of course the arch-enemy of your roof, and one of the primary aims of roofing standards and best practices is to ensure the roof is water-tight.
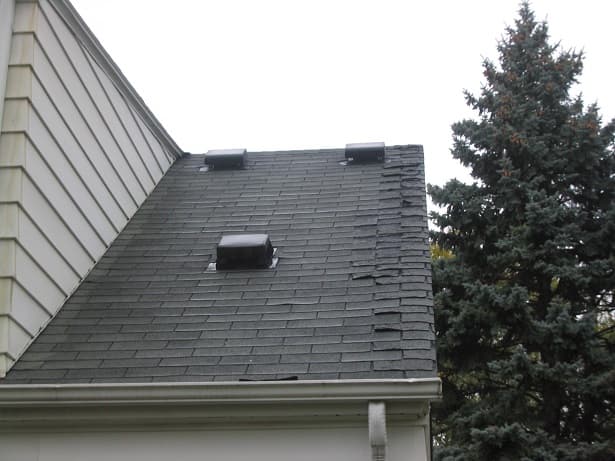
For all the damage that water can do, wind is a close second. Strong winds can lift up shingles—the roof’s first line of defense—allowing dirt and debris to weaken their adhesive bonds in the best-case scenario, and in the worst, blowing shingles right off.
Impacts from hail on the roof can cause cracks and bruises in the shingles as well as granule loss, which exposes the asphalt beneath it to the elements and greatly shortens shingle lifespan. Even if this damage does not result in an immediate leak, it sets the stage for one in the future.
After a moderate to severe storm, it’s prudent to give your roof a once-over (if you can do so safely) to look for any signs of damage. Most insurance policies will cover storm damage if it’s reported early enough.
Ice dams
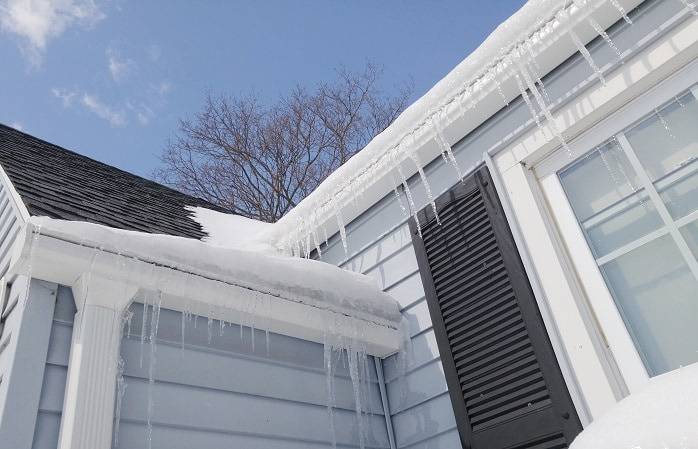
If you live in Minnesota and have a roof leak in the winter, the most likely culprit is an ice dam. These are caused by ice buildup at the edge of the roof that trap melting snow behind them. The ice dams themselves are heavy and can weigh down gutters, but their main threat comes from water that pools behind them unchecked, which can work its way underneath shingles and into the attic.
Ice dams can be readily mitigated by removing snow from the roof with a roof rake or using an ice melt in the middle of the dam to allow water to escape. Once that’s done you’ll want to have a professional inspect your roof to check for any damage from the incident, and to check the attic for proper insulation and ventilation to prevent their recurrence.
Compromised roof penetrations
Since the roof’s role is to protect your home, each object that penetrates it—pipe, vent, chimney, skylight—presents the risk of water intrusion. Installers use a number of practices to lower the risk of leaks at roof penetrations, including the use of flashing, pipe boots, and other reinforcements, but these wear down over time and often have a shorter lifespan than the roofing materials themselves.
Metal flashing can rust and crack over time, and the caulk used to secure it also breaks down. Pipe boots, which fit snugly over a protruding pipe and underneath adjacent shingles to protect this vulnerable junction, become less snug over time, as the rubber or plastic succumbs to the sun and other elements.
Periodic inspection of the area around roof penetrations is important to catch compromised flashing and boots before they allow for water infiltration.
Deteriorated chimneys
Of course, a chimney is a roof penetration so this point is slightly redundant, but considering chimneys provide so many potential pathways for water intrusion through the roof, they deserve their own mention. Cracks in the concrete chimney crown, caused by Minnesota’s freeze-thaw cycle ad infinitum, provide a pathway for water to enter through the chimney and into the home, as does deteriorating mortar between bricks, cracked or spalling bricks, and rusted, bent, or poorly installed flashing or crickets at the base of the chimney. And a chimney flue without a rain cap practically begs water to enter this open chasm through the roof absolutely unhindered.
Chimney experts are not by default roof experts, so it’s prudent to have a professional roofer examine any roof-related leaks, no matter their suspected origin.
Improperly driven nails
Fastening shingles to the roof decking is a fairly precise skill. The specific position of nails within the shingle is of enough importance that manufacturers mark shingles with dotted lines to aid the installer in proper placement. Even so, whether due to inexperience, haste, or other forces, it’s fairly common for nails to be improperly positioned, sometimes missing a shingle altogether, leaving it less secure and prone to sliding or blowing off.
Similarly, nails that are “over-driven” sink deep into the shingle or even right through it, leaving it loosely secured. “Under-driven” nails or nails driven into the shingle at an angle leave the nail head protruding. This defect can result in the nail “popping” as the loosely fastened shingle moves, and also allows for water to follow the nail head down through the roof, causing a leak.
Wear and tear
Of course, this is a cause almost too obvious to mention, as “wear and tear” spares nothing earthly except maybe diamonds and Christie Brinkley. But a point worth mentioning is that there is plenty we can do to mitigate the effects of wear and tear. First and foremost is proper installation. Many of the defects that lead to roof leaks and are attributed to wear and tear—loose shingles, exposed nails, leaky penetrations—could potentially be traced back to inferior workmanship or materials.
So yes, every roof is subject to deterioration over time due to the elements, but a roof that is expertly installed with quality materials by a certified roofer is going to stand up to “wear and tear” a lot longer than the alternative.
Schedule a free damage inspection
We’ll meet you at your home, assess the damage, and consult with you on our findings—all with no obligation.
